
Using the Template Editor, you can easily convert an After Effects project file into a Creative Template that can be used to create videos within Shakr Studio.
In the Template Editor, we will be going over all image/video/text layers within the AE project file and mark which of them will be editable through the Video Editor or API.
Before uploading the After Effects project file, we highly recommend you to thoroughly read through our Custom Creative Templates Overview. This guide will walk you through on more specific details about best optimizing After Effects file to be used as a custom creative template in Shakr Studio including:
- Planning creative templates
- Preparing resources
- After Effect Integration
This feature is available for all users on paid plans (excluding Creative Lite). If you need additional assistance on how to get access to the feature, please contact your account manager.
Let’s get started
The Template Editor has an auto-save feature. If you quit the editor mid-way, the changes made so far will be saved in your browser’s storage. If you open the Editor again using the same browser, you will see the “Resume from saved draft” option enabled.
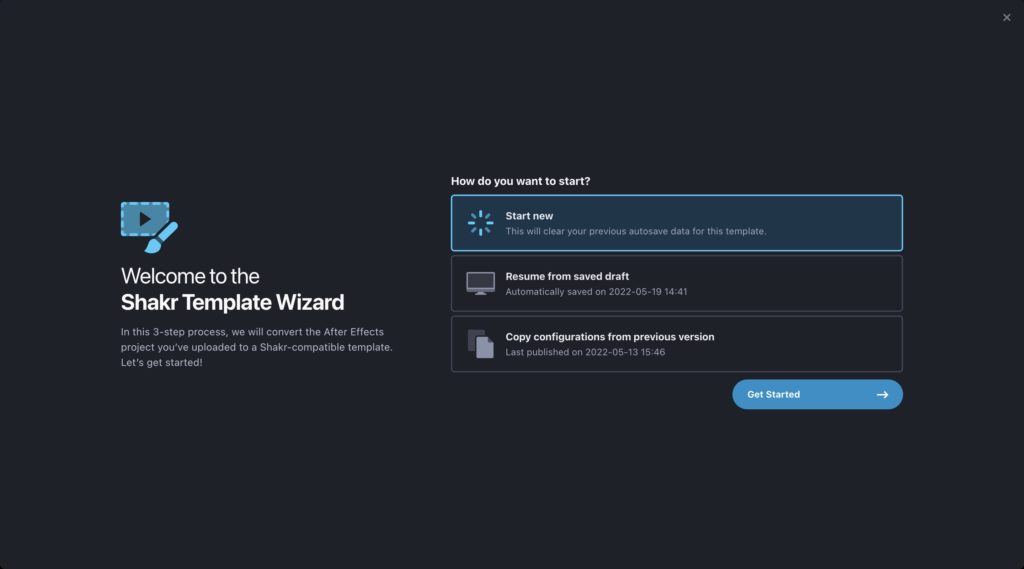
In this guide, we will be starting from scratch. Choose “Start New” and click on the “Get Started” button.
Step 1 – Setup customizable colors
Layers using the Color Peacock (Color Customization) preset effect will be automatically detected and displayed as color layers.
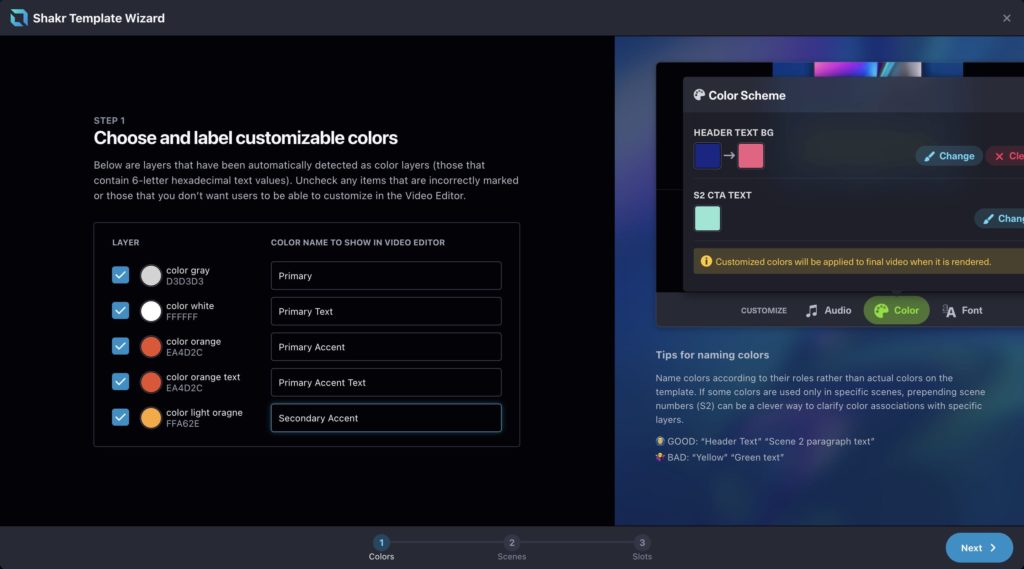
If you see any layers that have been incorrectly detected as color layers, or would like to prevent users from changing certain colors, uncheck the items to turn them into plain text layers.
Remember to set the names of the colors to something that the user can easily understand in which part of the video is the color used. (See the ‘tips’ on the right side of the screen.)
If you’re not entirely sure what colors affect which part of the video, name them with something temporary, advance to the next step to see the video, then come back later to enter accurate names.
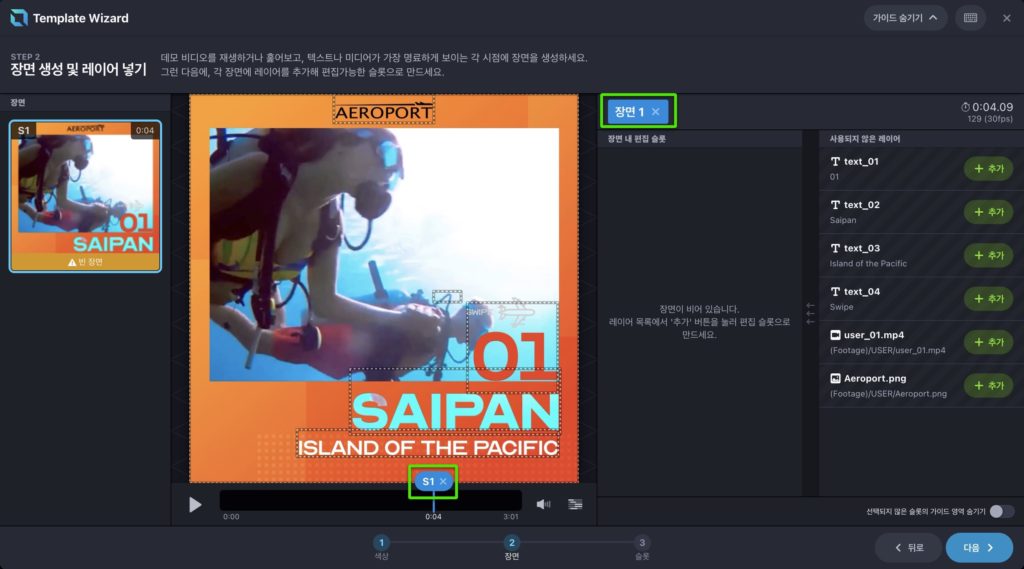
Step 2-1 – Set up Scenes
When making a video in the Video Editor, the user will be changing media or text using the slots set up in each ‘scenes’. As such, creating scenes at right places is important for the user experience. Let’s start placing scenes while keeping in mind which slots will go where.
Creating Scenes
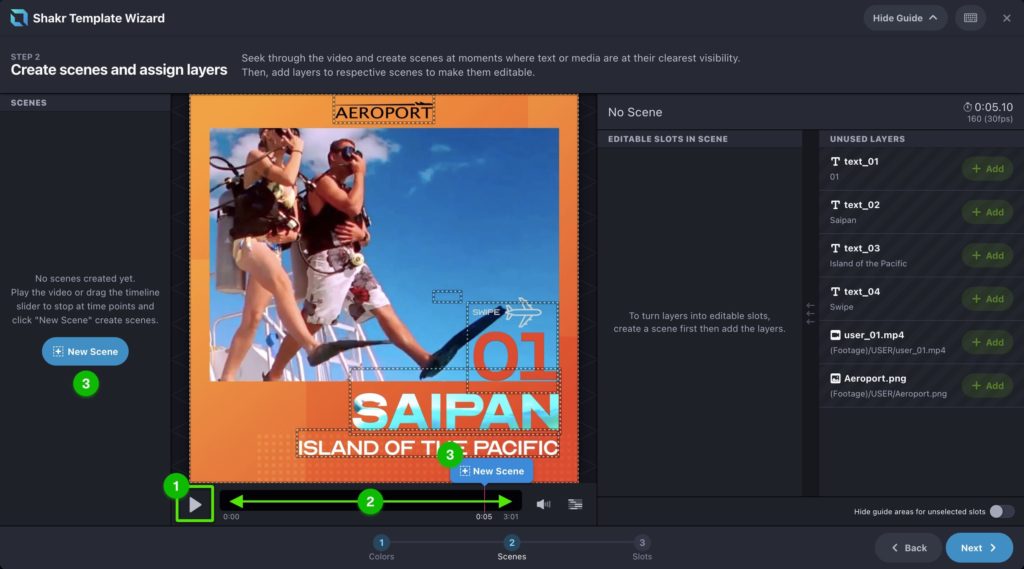
Press the play button (1) or spacebar on your keyboard to play the video. You can also drag the timeline slider (2) to quickly scrub through the video quickly. Find an adequate spot to place scenes. There is no absolute answer as to where scenes should be placed—but there are best practices:
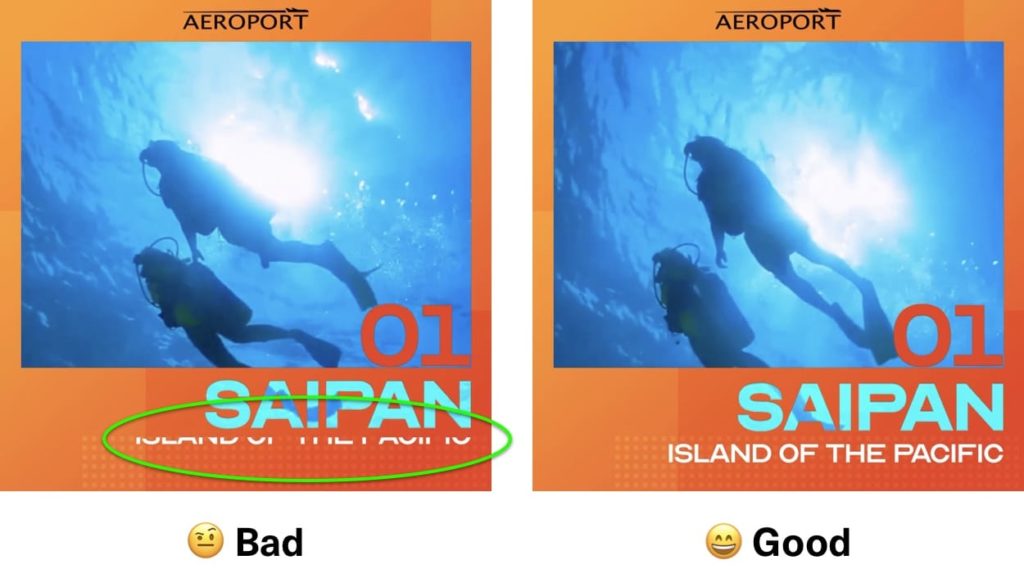
- Place scenes where the text/media is at its clearest visibility
Find a spot where there is the least amount of motion for the elements that will be set as editable slots. For example, when a text is flying in from outside the video frame, wait until the transition animation is finished so nothing is obscured or looks blurry. - Prefer placing scenes where contextually relevant elements are simultaneously visible
Say if you have a layout with multiple text together, but each of them appear in consecutive order. Rather than creating separate scenes with single slots in each, wait until all of them are on screen then group them together into a single scene. It will save some time for the user as well as help them better understand the context.
When you find a nice spot for a scene, click on the ‘New Scene’ (3) to create the scene. You can also press ‘S’ on your keyboard as a shortcut.
Deleting Scenes
If you have to delete a scene, click the blue scene badge on the top of the right sidebar, or the scene badge on the timeline.
If the scene you’re trying to delete already has scenes in it, the slots will be reset to layers. If the slots have any guide areas set in Step 3, they will be reset as well.
Step 2-2 – Set up slots in scenes
Now that we have scenes, we will add slots to them.
Each scene must have at least 1 text or media slots.
Add slots to scenes
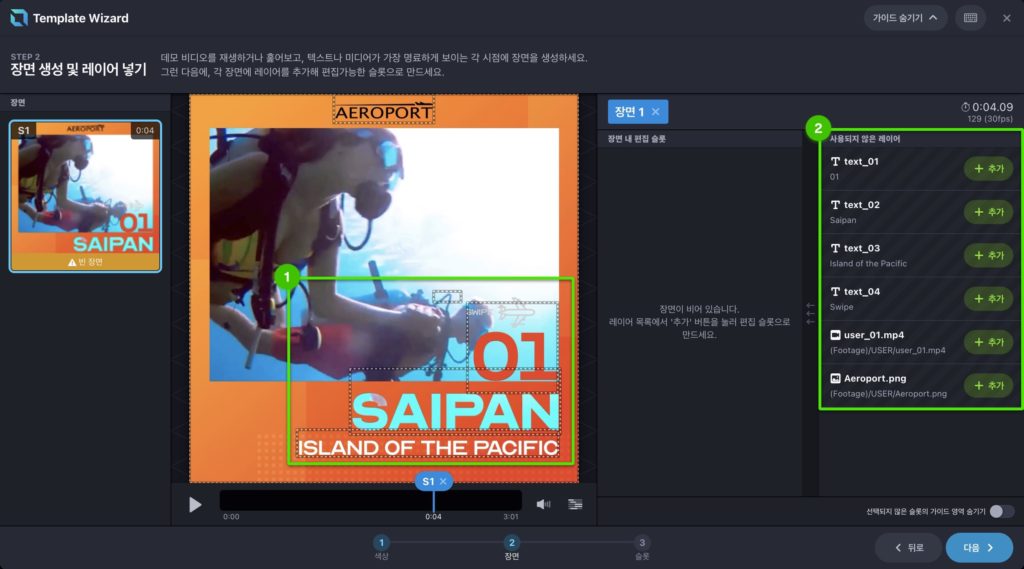
First, make sure you’re selecting a scene. Let’s add items visible on screen that we’d like the user to be able to edit.
You’ll see boxes marked with white dotted lines (1). These mark the predicted area positions for layers as determined by the Shakr system. When you click on one of these, the corresponding layer will be highlighted from the list at the right (2). Thanks to this, we can be sure which layer is associated to what inside the video.
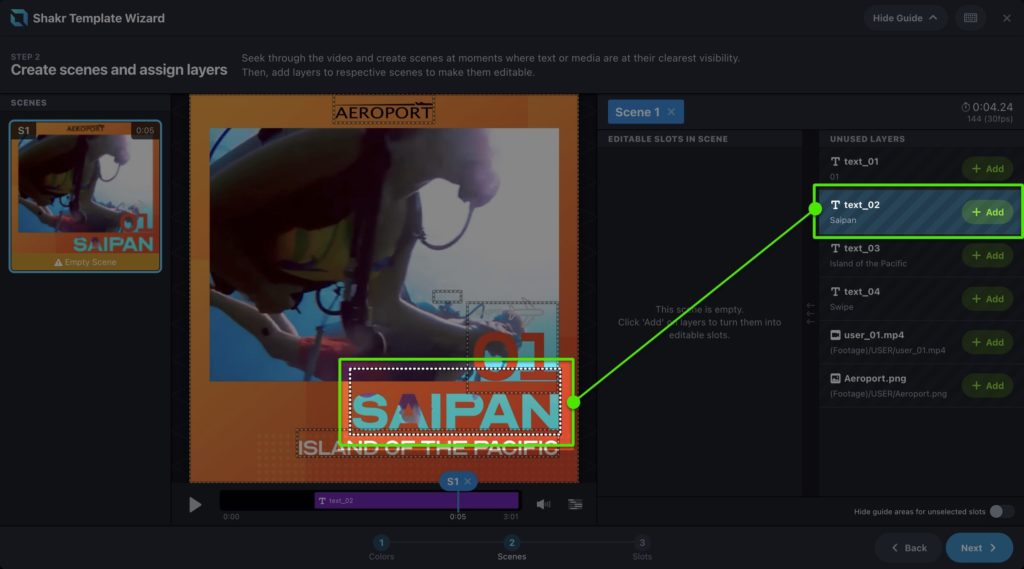
For example, in the template above we can see that the blue “SAIPAN” text corresponds to the layer named text_02.
There may be occasions where the predicted area is offset, twisted or completely off compared the actual element in the video. This is usually due to any animations applied on the layer—but rest assured, we can manually set the final guide area visible to the user in the next step of the editor.
When you found the layer you want to add, press the “Add” button. You can also press “E” to quickly add/remove selected layer to the scene.
Deleting slots or moving them to another scenes
Predicted areas will turn to a green border when you add them to a scene.
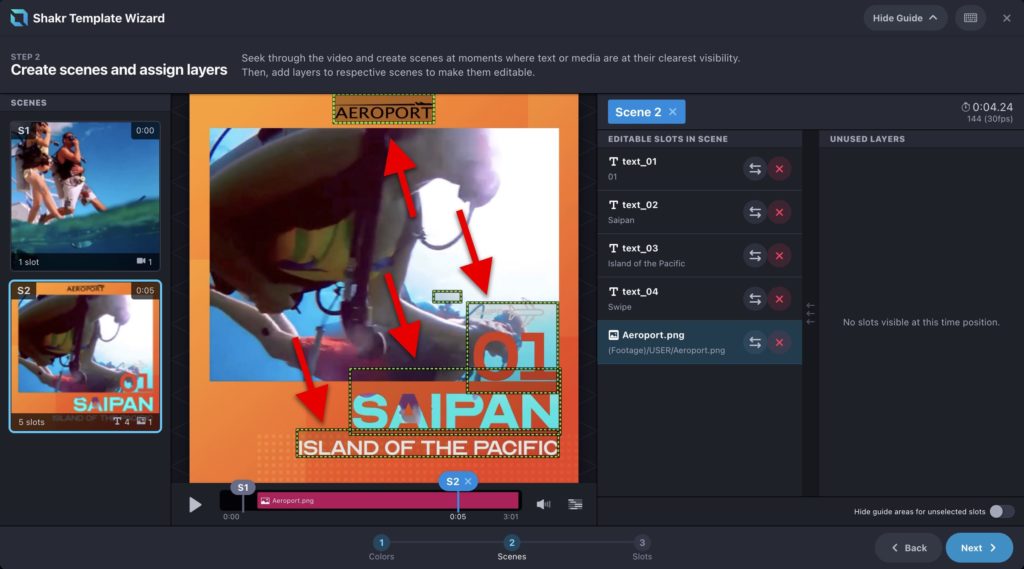
If you wish to remove a slot from a scene, press the  button to turn it back to a layer state.
If you wish to move a slot to another scene nearby, click on the arrow  button. You will be given a list of scenes where the slot can be moved to.
When you’re all done with setting up scenes and slots, let’s proceed to the final step.
Step 3 – Set up guide areas
Last but not least, we’ll be setting up actual guide areas for all slots.
Let’s first take a look at how a finished template looks within the Video Editor:

The text/media icon bubbles are placed automatically by the Editor, so we only have to worry about the boxes being at right positions and sizes.

When you click on the dotted areas (1) on video or slots from the list (2), the Editor will automatically apply the predicted area as the guide area. When a guide area has been set for a slot, the box borders will turn to a solid line.
Depending on your template, there may be cases where the predicted area is good as-is. But if it is not, you can freely edit the box shape.

Click on the boxes to switch selection between different layers. Drag the shape to move it around, drag the handles at the edges to resize the shape—this should be easier said than done if you’re familiar with other graphics editing softwares.
Remember, the goal here is to try to have the shape match the actual position of the element on video.
If any part of the guide areas are placed out of the video frame bounds, the Editor will warn you of those layers. You will need to fix these areas before trying to finish the Editor.
Advanced option: Manually setting maximum length of text slots
There may be occassions where the user writes too many characters in to a text slot within the Video Editor, causing the text to overflow. This may cause less than ideal results in the rendered video such as text being clipped. To try to prevent these issues we can manually set the maximum text length for individual text slots—which if set, the Video Editor will display a warning message if the user enters more characters than the optimal length.
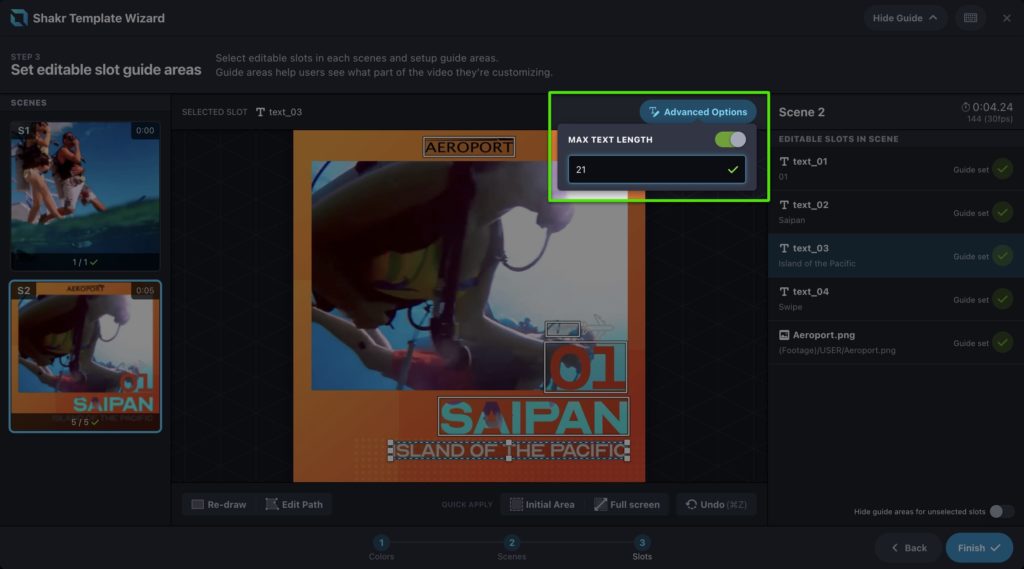
To find the appropriate maximum text length for each cases, please test with various texts with differing lengths during testing phase within After Effects, or use the Text Resize expression that automatically resizes the text size to fit in to the textbox.
Finish
Revisit each scenes to review if all slots have been set properly.
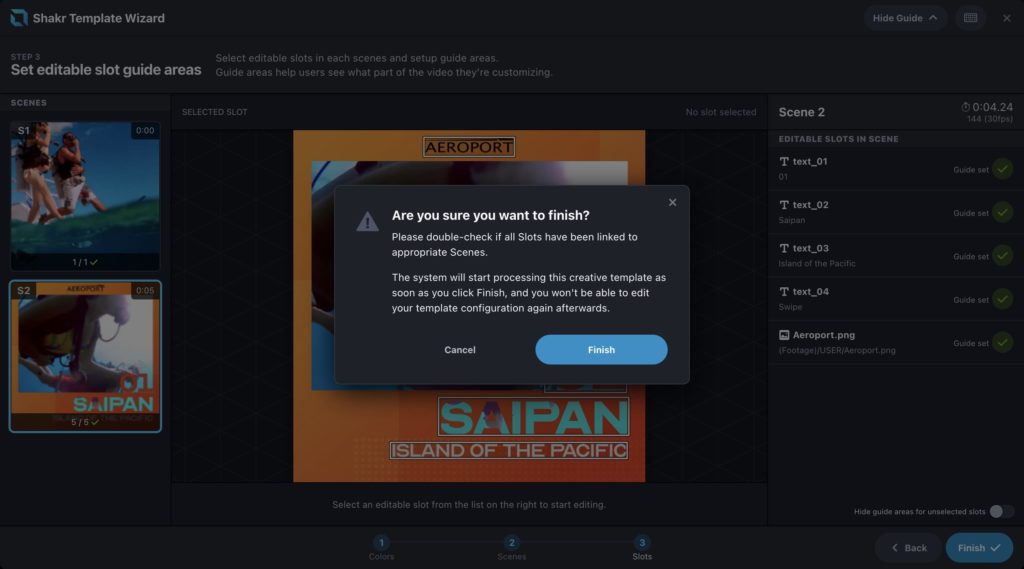
Check if the guide areas are placed at their best positions. When you’re done, press Finish to complete the process.
Bonus: Keyboard shortcuts for even faster workflow
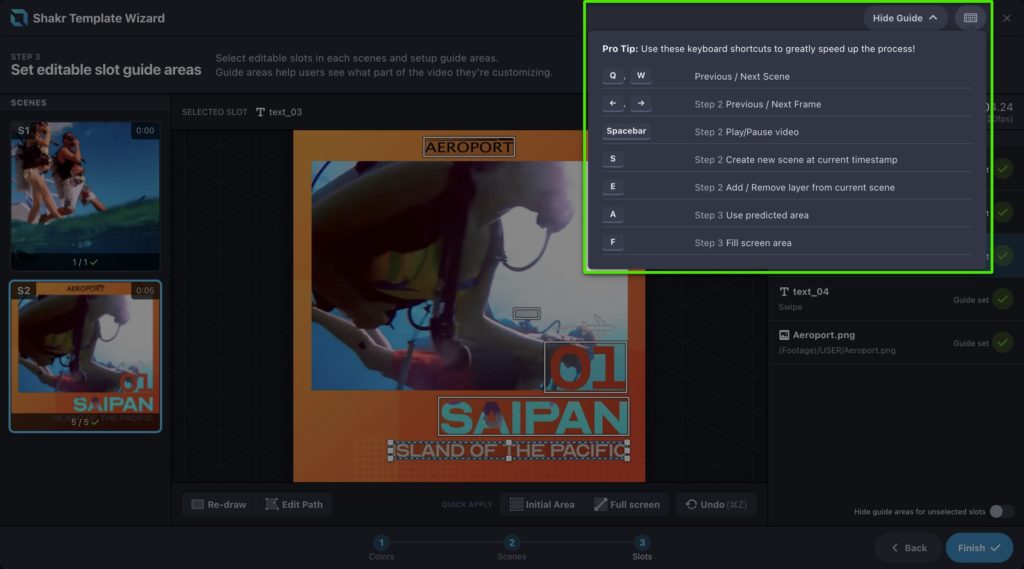
Template Editor provides a number of keyboard shortcuts for frequently used actions. The keyboard shortcuts could potentially be a great time-saver for the entire process, especially when performing repeated actions such as adding layers to scenes. Click on the keyboard icon button on the top of the Editor to learn which shortcuts are available.